We are growing up seeing those amazing eyeliners of the celebs. It’s the makeup trend that never bites the dust and just ages like fine wine. What’s more, genuinely, we thoroughly get it. Winged eyeliner can immediately raise any cosmetics look or get everyone’s attention all along. It adds dramatization to each cosmetic look, makes your eyes look conspicuous, and can be worn in countless various ways. In particular, it praises pretty much every cosmetics look. Assuming you’re somebody who battles with this dazzling eyeliner style and consistently on the chase after ways of culminating it, here are 5 steps to follow every girl must follow for that perfect wing:
Stage 1: Have the Right Tools
Your instruments and application matter similarly however much the items you’re utilizing. Put resources into a decent calculated eyeliner brush. For sharp wings and better accuracy, search for calculated brushes that are slight. Calculated eyeliner brushes make the interaction more straightforward than you can envision.
Stage 2: Choose the Right Eyeliner
Pick an eyeliner definition and shade of your decision. Eye pencils and kajal are the most straightforward to work with. They’re rich and wreck-free. Be that as it may, assuming the tip of the pencil is gruff, you’ll wind up defining thicker boundaries than expected. Following eye pencils are gel eyeliners and afterward fluid eyeliners. Like pencil liners, gel eyeliners are smooth however can get muddled assuming you unintentionally pick an excessive amount of item on your brush. Fluid eyeliners are the hardest to work with.
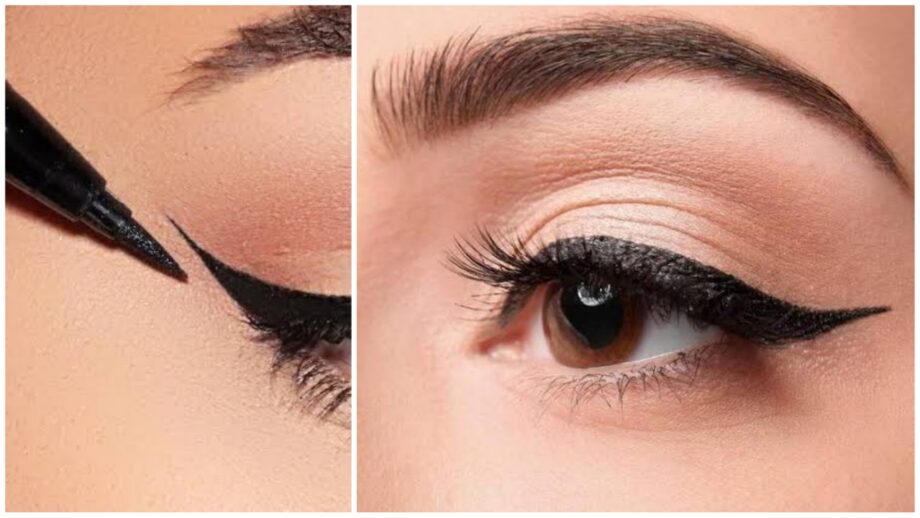
Stage 3: Get Started With Your Wing
Dunk your brush in your eyeliner and pick the sufficient sum. Ensure you don’t get a lot on your brush or it will get all over the place. Whenever you’ve stacked the brush with eyeliner, delicately wipe the brush on the rear of your palm to dispose of the abundance item and make your brush more slender for a fresh line. Start by defining a rakish boundary from the finish of your eye, towards the finish of your eyebrow. Keep the line at around 20-30 degrees. Attempt comparable on the opposite side.
Stage 4: Build and Fill
Plunge your brush in the liner again and begin bringing the liner inwards. Beginning from the external corners, pull the line towards the center and make a triangle on the external corners. Fill in that triangle and add more assuming you wish to make the wing thicker or longer. Assuming that you wish to carry the liner the whole way to your internal corner, keep the liner thicker on the external part.
Stage 5: Clean Up
As referenced above, it’s insightful to begin little and work as you go because it’s more straightforward to add than to remove. However, on the off chance that you wind up making your eyeliner thicker or greater than you needed, you can fix it by utilizing some cosmetics remover on a Q-tip or minuscule eyeliner brush. Simply plunge it into a cosmetics remover and clean away your missteps!
Keep reading with IWMBuzz.com.
